Lately I have been shooting lots of photogrammetry environments, and more recently optimizing them for VR applications. These next two posts will document my workflow, which is very much a work in progress. First I will quickly cover the shoot, organizing photos, stitch panos, process the scan, make low poly, new UV’s, project scanned textures, bake detail maps, and put everything back together in Sketchfab. The second part of the post will cover doing a de-light process on the scanned data textures, then moving the assets into Unity where the HDR pano can act as our true light source.
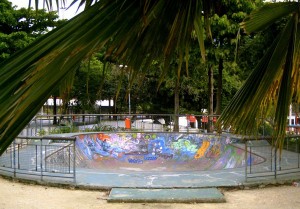
THE SHOOT – 2/29/2016 Rio de Janeiro, 10am very cloudy morning at lagoa skate pool.
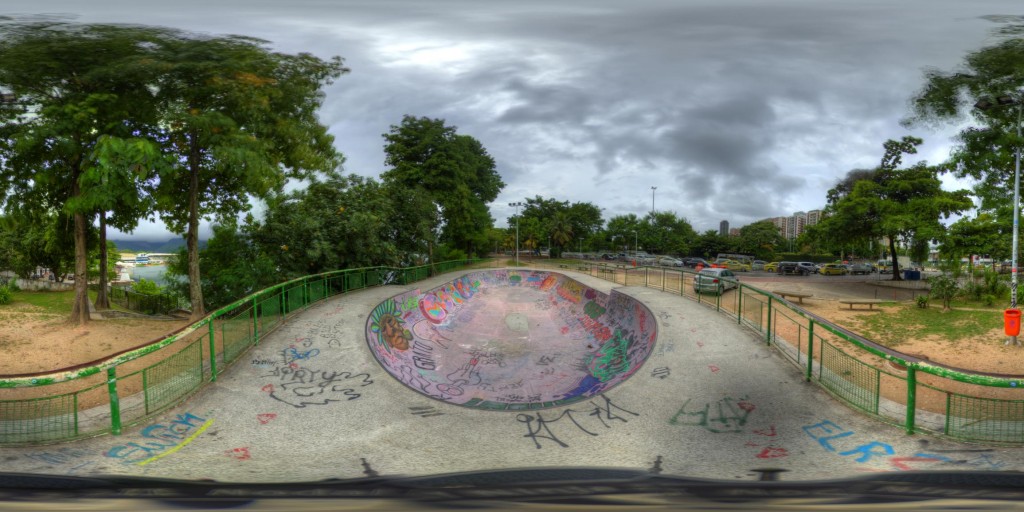
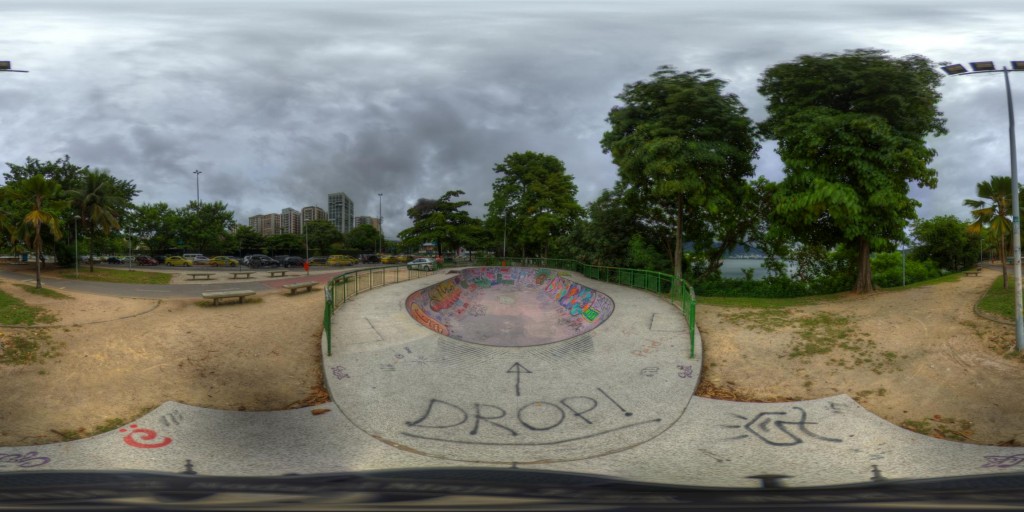
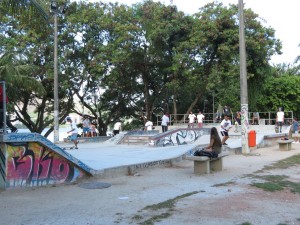
I have previously packed my small camera bag with tripod, nodal ninja, Promote, and Nikon D40 with 8mm fisheye for shooting HDR panoramics. Along with this I use a very small Sony a7 with Zeiss F/24-70mm lens and remote control to shoot the photogrammetry shots. Because this is Rio a vaguely dangerous city where people get knived, and camera gear can easily get stolen, I keep everything on me at all times, and always shoot quickly. If any Cariocas out there want to go on a shoot with me to help with keeping watch, please do contact me on Twitter. There are two spots I want to capture, so I start with the larger skate park shooting the perimeter photogrammetry shots.
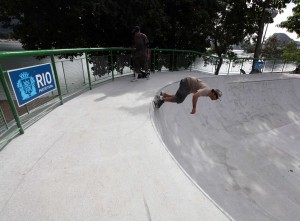
One new idea here I got from Jeffery Ian Wilson who runs the great 3D Scanning users group on Facebook. http://www.jeffreyianwilson.com/ He suggests shooting the photogrammetry shots in brackets to get extended dynamic range during your scan, and since my panos will be very HDR also, this seems like a great time to try this. I went with brackets of 3 photos, with +/- 2 stops around the middle exposure. My camera is set to lowest ISO 50, cloudy white balance, RAW, fixed aperture of f/22, portrait, on a tripod, with remote control. Basically everything I could do to get sharpest images possible. For this, the 2nd location pool, I shot 96 positions around, or 288 photos in total. I really just walked around the edge of the pool, moved tripod a foot each time and shod, it was small enough that I did not go inside for more photos.

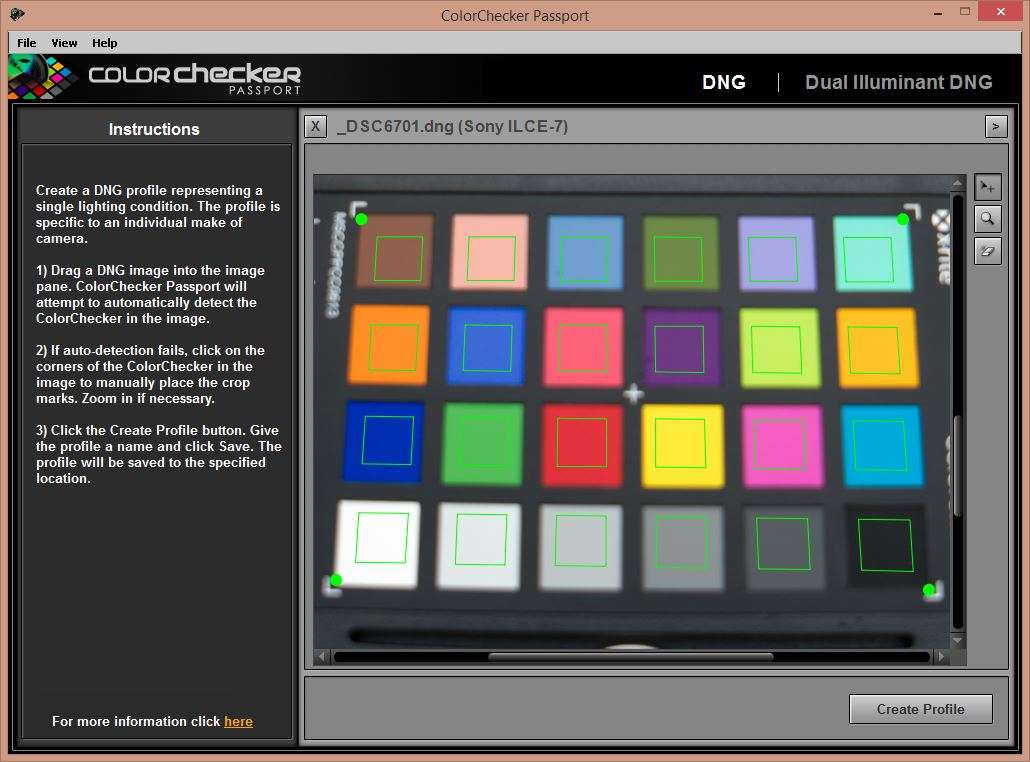
To shoot the panos I pack up the Sony mirrorless, and set up my Nikon D40 with nodal ninja, Promote, and 8mm fisheye lens. I wish I could shoot both things with the same camera, but unfortunately the Sony does not work with the Promote, and there is no great way to set up good Auto Bracketing on that thing. To help color match the two sets of images later in Lightroom it is now crucial to shoot my Passport Color Checker which will allow me to first thing get decent white balance and color profile of the camera in that days light. With one good shot or bracket of the Color Chart from each camera for each lighting condition, you can generate camera profiles and bring the images much closer.
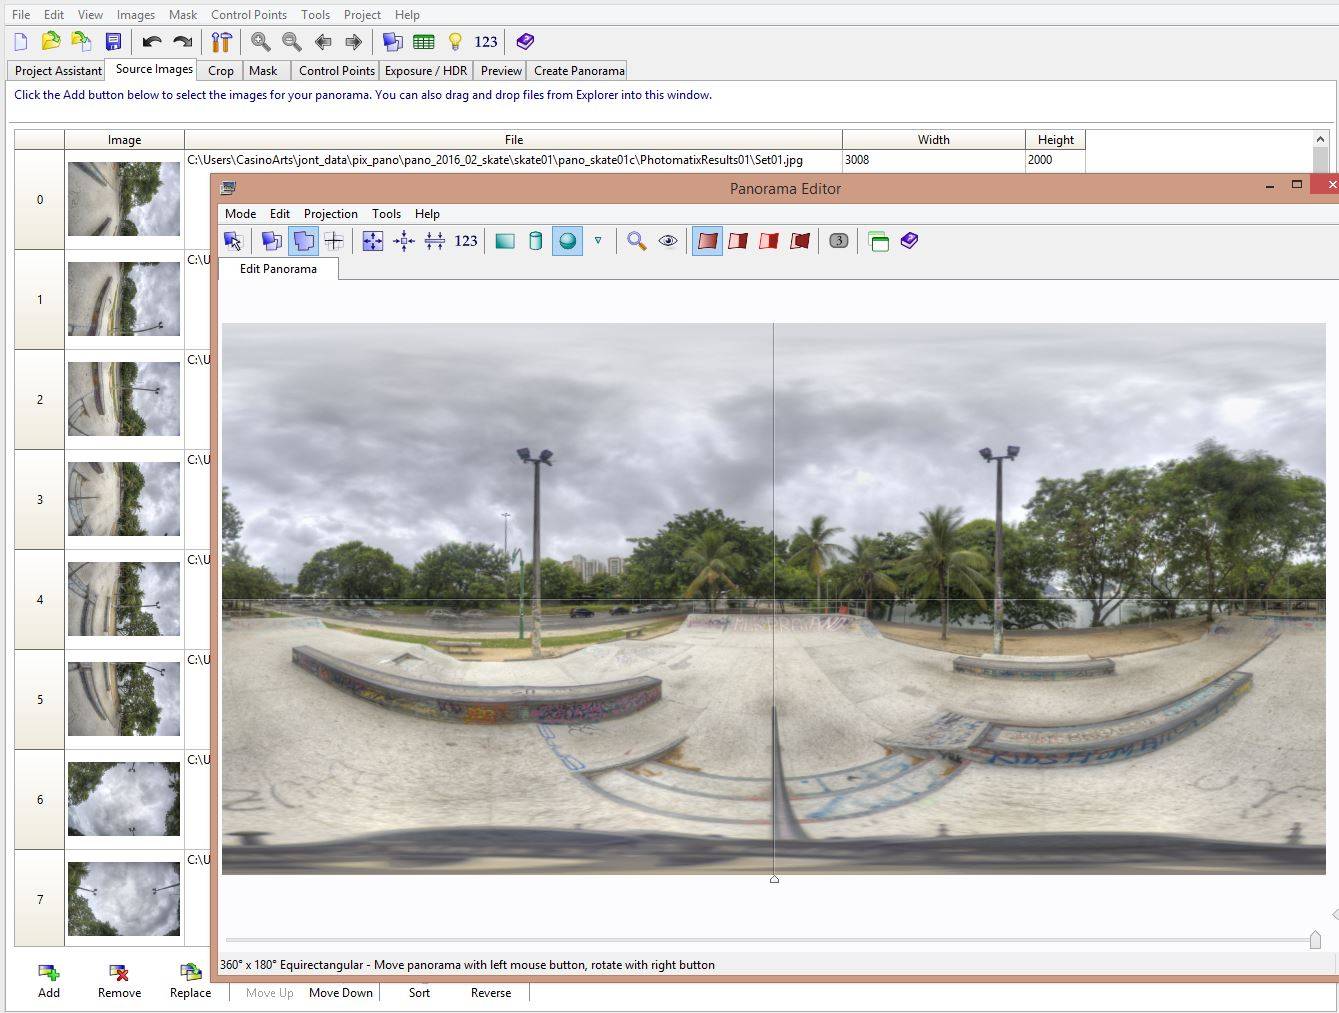
I describe in detail how to shoot HDR panos here, http://tojek.com/vfx/?p=197, but in short I shot 11 pictures in my exposure wedge, turning the nodal ninja around 60 degrees each segment for 6 shots around, two up, and two down, making a total of 110 photographs. This is a little excessive, but I used a very small difference between shots of 0.7 EV because the range of light on a cloudy day is smaller then a big sun day, so I shot more exposures in a smaller range to get cloud detail. Once I was home I felt the photos were a touch bright, so I did bring them down a stop in Lightroom before any other processing. For this oval pool I shot one pano on each end of the pool. This idea work for monuments also, in that I want to have front and back of any object so I can sort of paint it out or minimize it later with a collage HDR pano which really does not want the subject in there, but rather wants the environment, and especially the light elements. Lastly I shot on inside the pool because I could not resist and it looks cool, maybe will use it, but not sure.
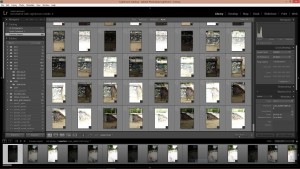
Organizing Photos and Initial color balance.
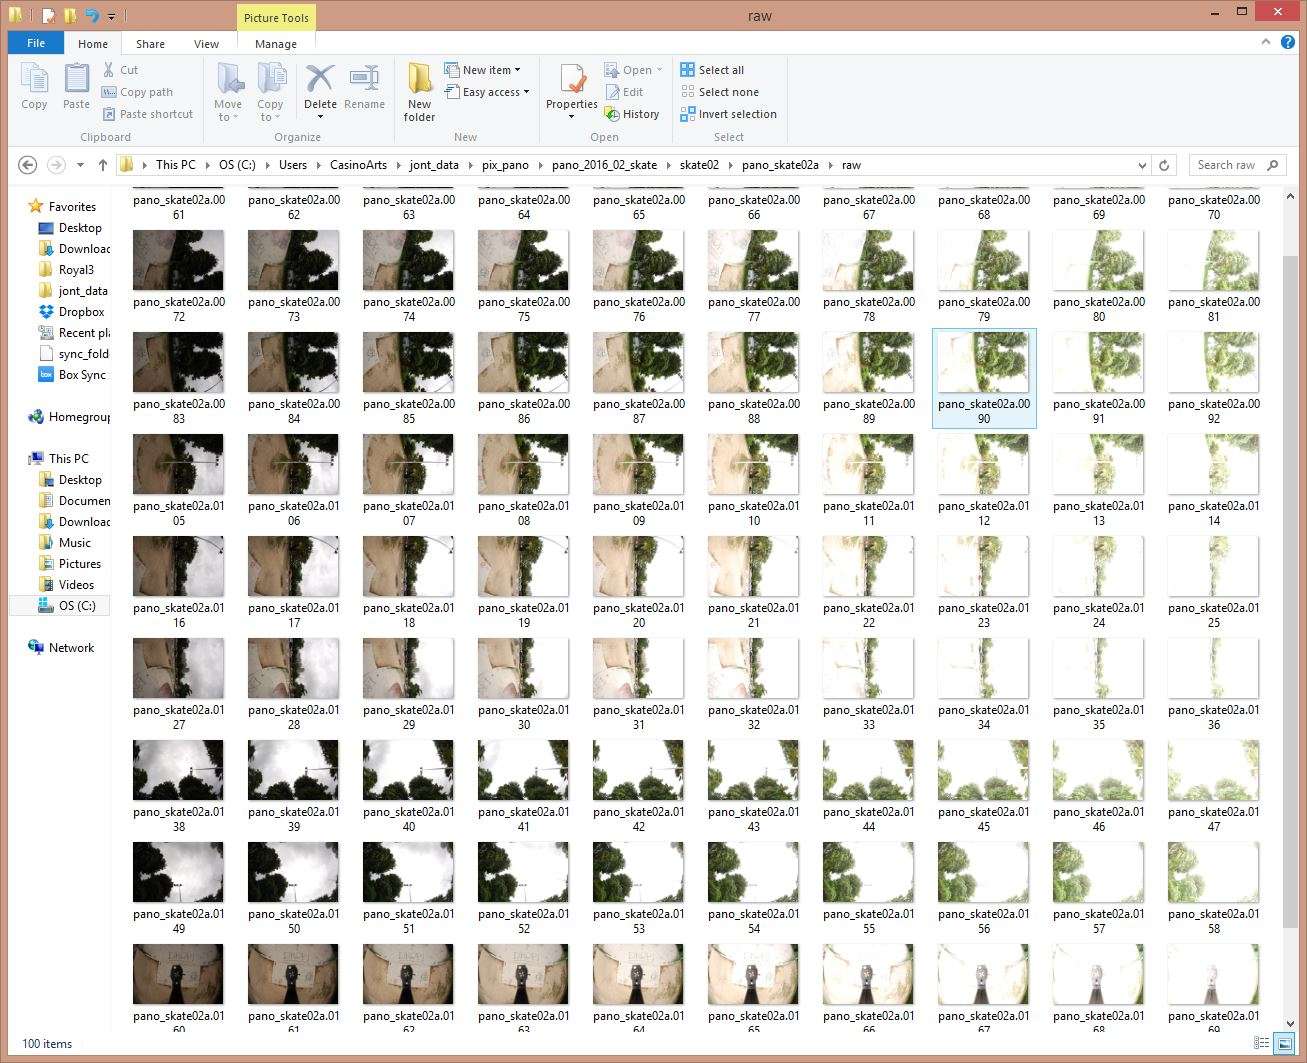
First get all the photos off your camera and into folders on your PC, because you may get home with 1000’s of new shots it is important to get them into folders per scan and per panoramic image. Do this first and use a consistant organizing method which includes renaming of files with a simple utility such as FileRenamer. http://www.sherrodcomputers.com/products_filerenamer.cfm
This step is boring but crucial because you will be processing these photos through 10 different software programs over the next couple days, and they all originate from these organized RAW photos. When you archive your big data project for later, this is the only part worth saving and the million Megs of 16-bit intermediary tiffs and HDR’s can all be tossed.
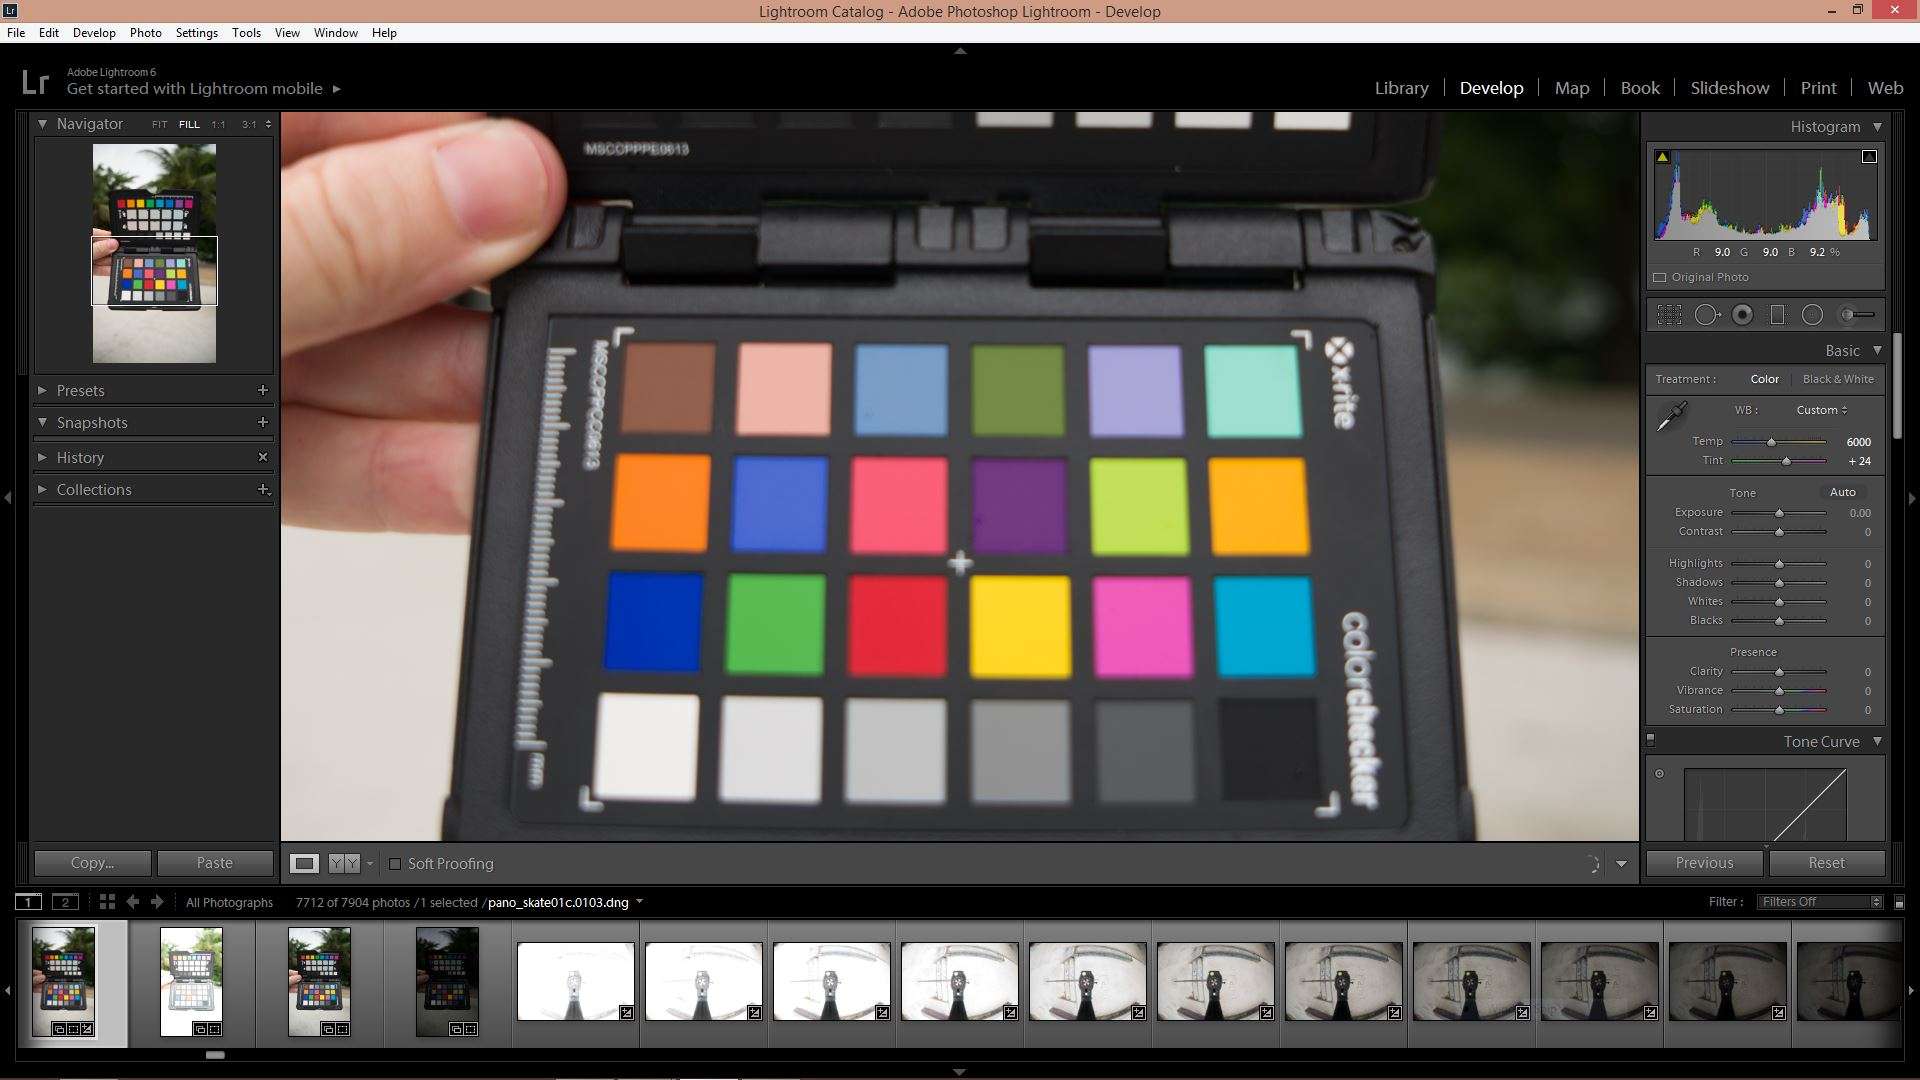
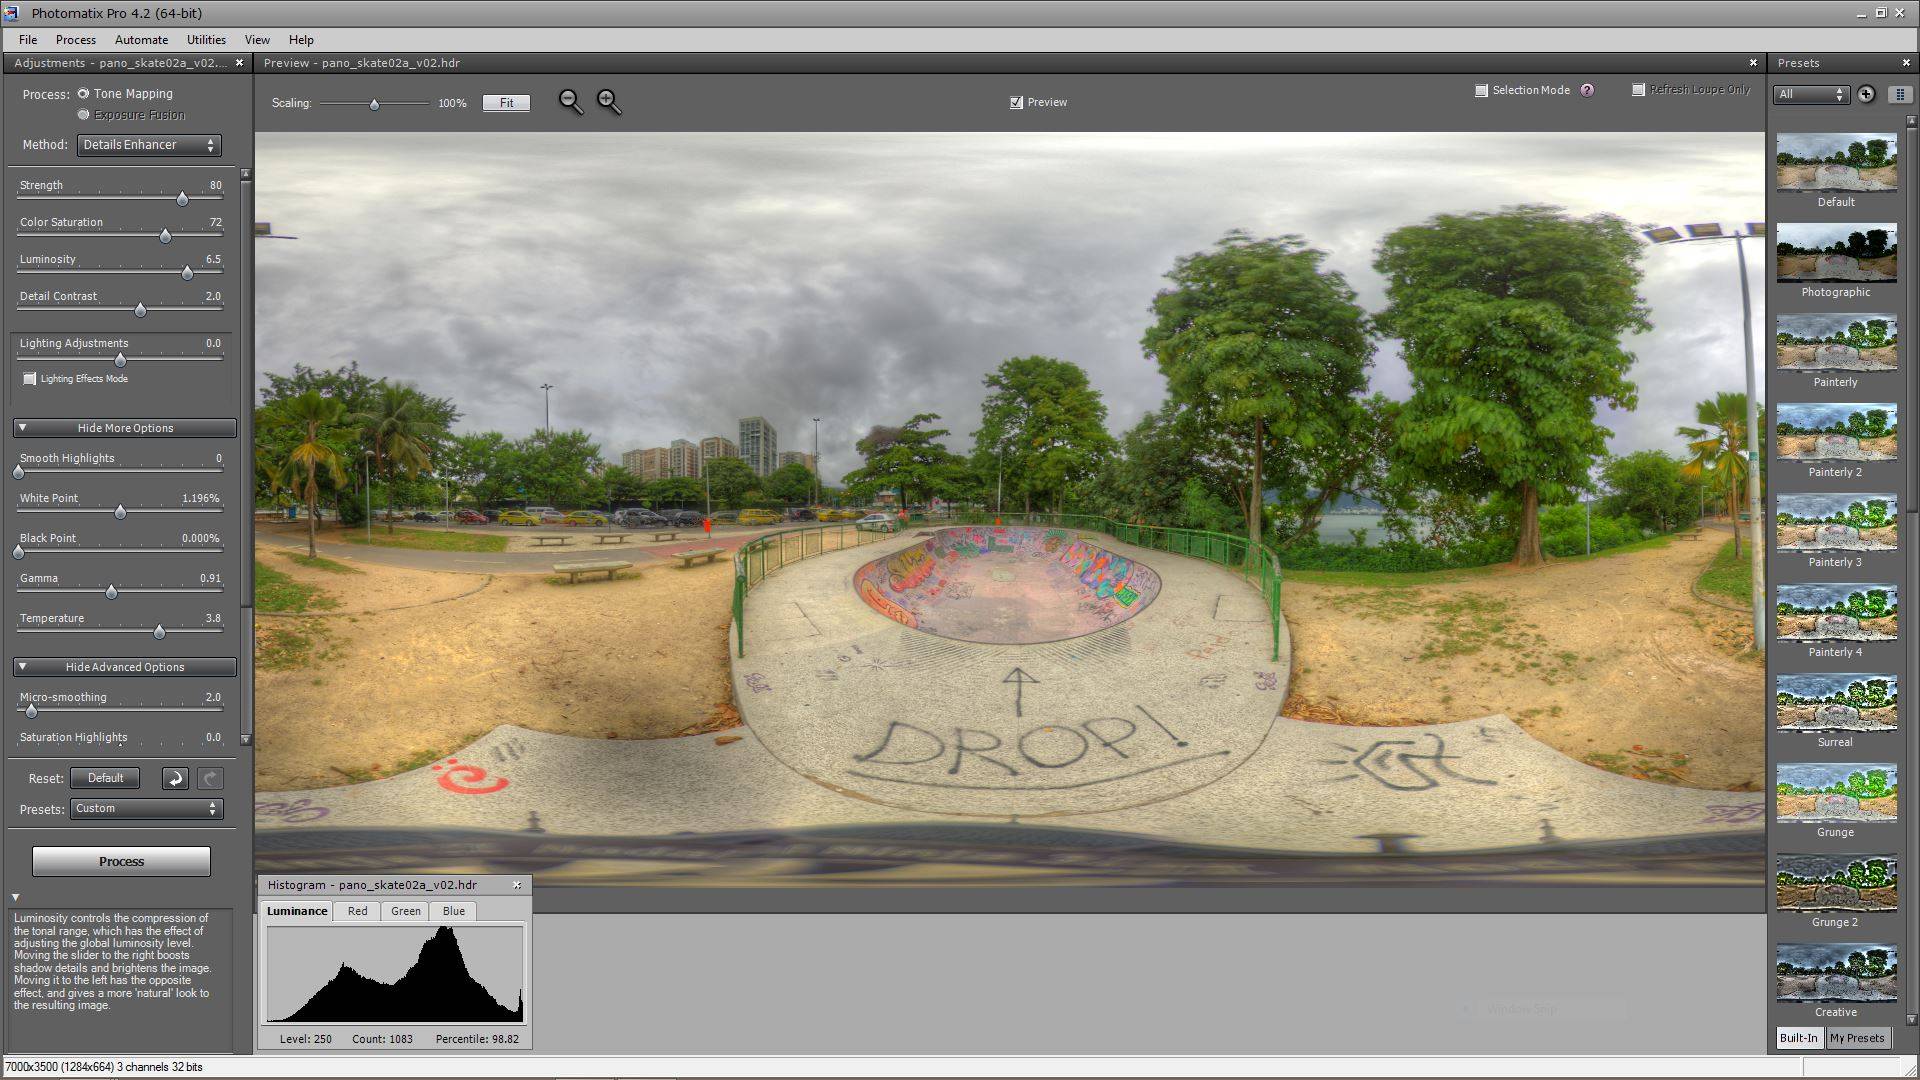
Lately I am using Lightroom a lot, especially now that it can merge HDR brackets, so this is how I made linear 16-bit tiffs from the 3 exposure brackets I shot for the scan. Also this is where I pull out the color chart photos and use the middle gray chip for white balance, in addition to using the ColorChecker Passport utility software to make camera profiles and get my two cameras to match up. We really want the HDR panoramics to have the same color as our scan textures. Through the whole process we color shift a little as possible, tiny gains if necessary, and everything down the line stays floating point linear color, so always 16-bit tif, HDR, and openEXR formats. By the time we get to the very last step in Unity, we want the freedom to do stronger color correction there if needed, but otherwise, we are only pushing pixels a tiny bit to keep a linear color pipeline.
Stitch Panos
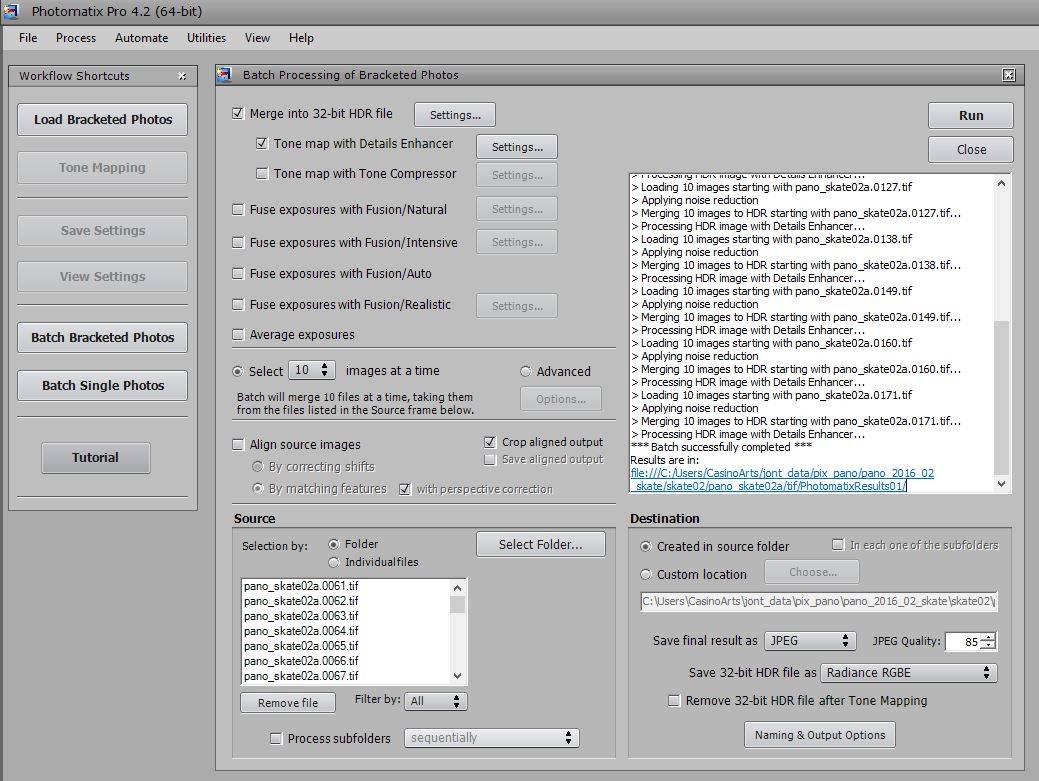
This process is a pain, but after doing it a million times it can be fairly automatic. From Lightroom I have the 16-bit tiffs exported out with a decent white balance and color chart adjusted. Using Photomatix I then hit “batch bracketed photos” with settings to process sets of 10, and output a nice HDR along with a matching jpeg which keeps the EXIF data. These 10 jpeg segments get imported into PTgui where I stitch. The stitch is almost always automatic and fast, then I swap out the jpegs for the HDR files which get exported out to a 7k HDR pano. Yawn. I learned alot of great pano stuff from Christian Bloch, and his great website and book. http://www.hdrlabs.com/news/index.php
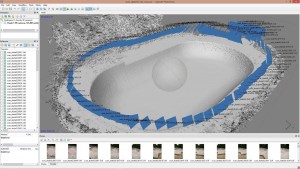
Agisoft Photoscan – Process the scan
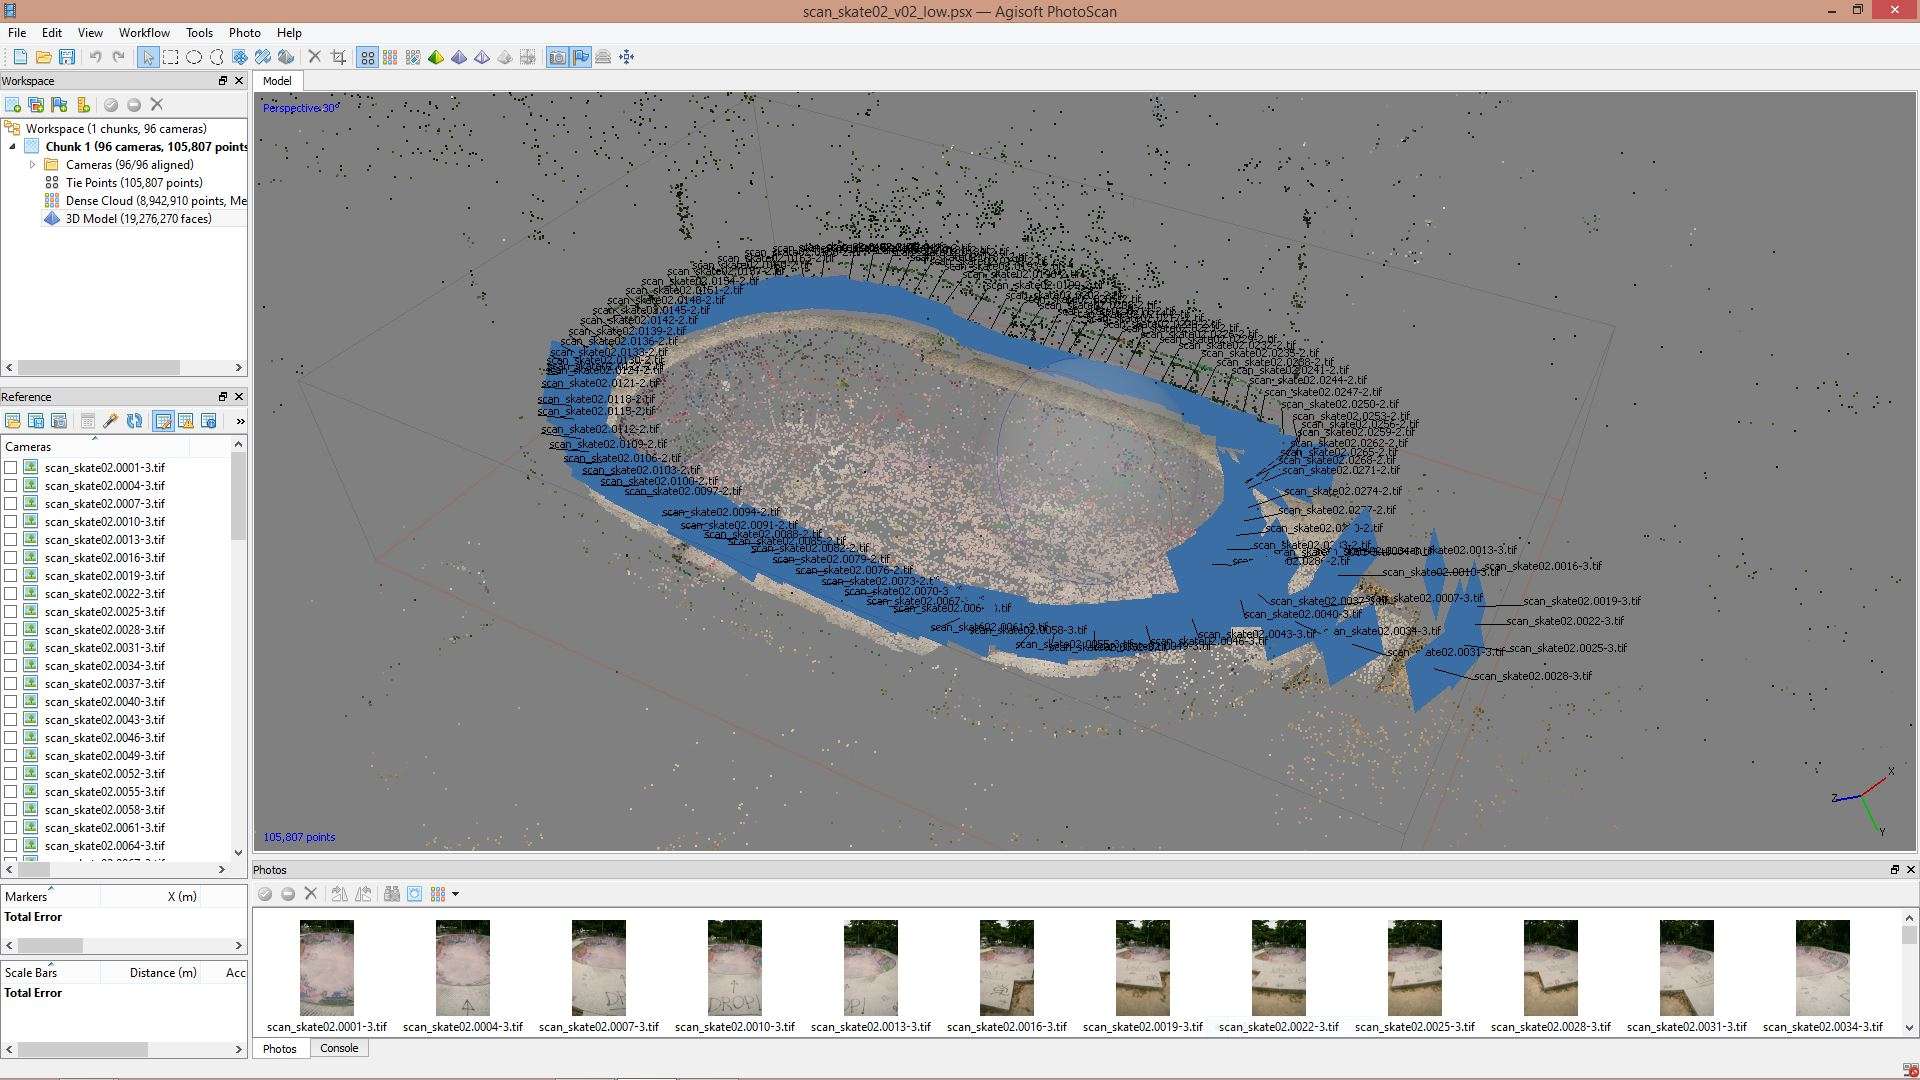
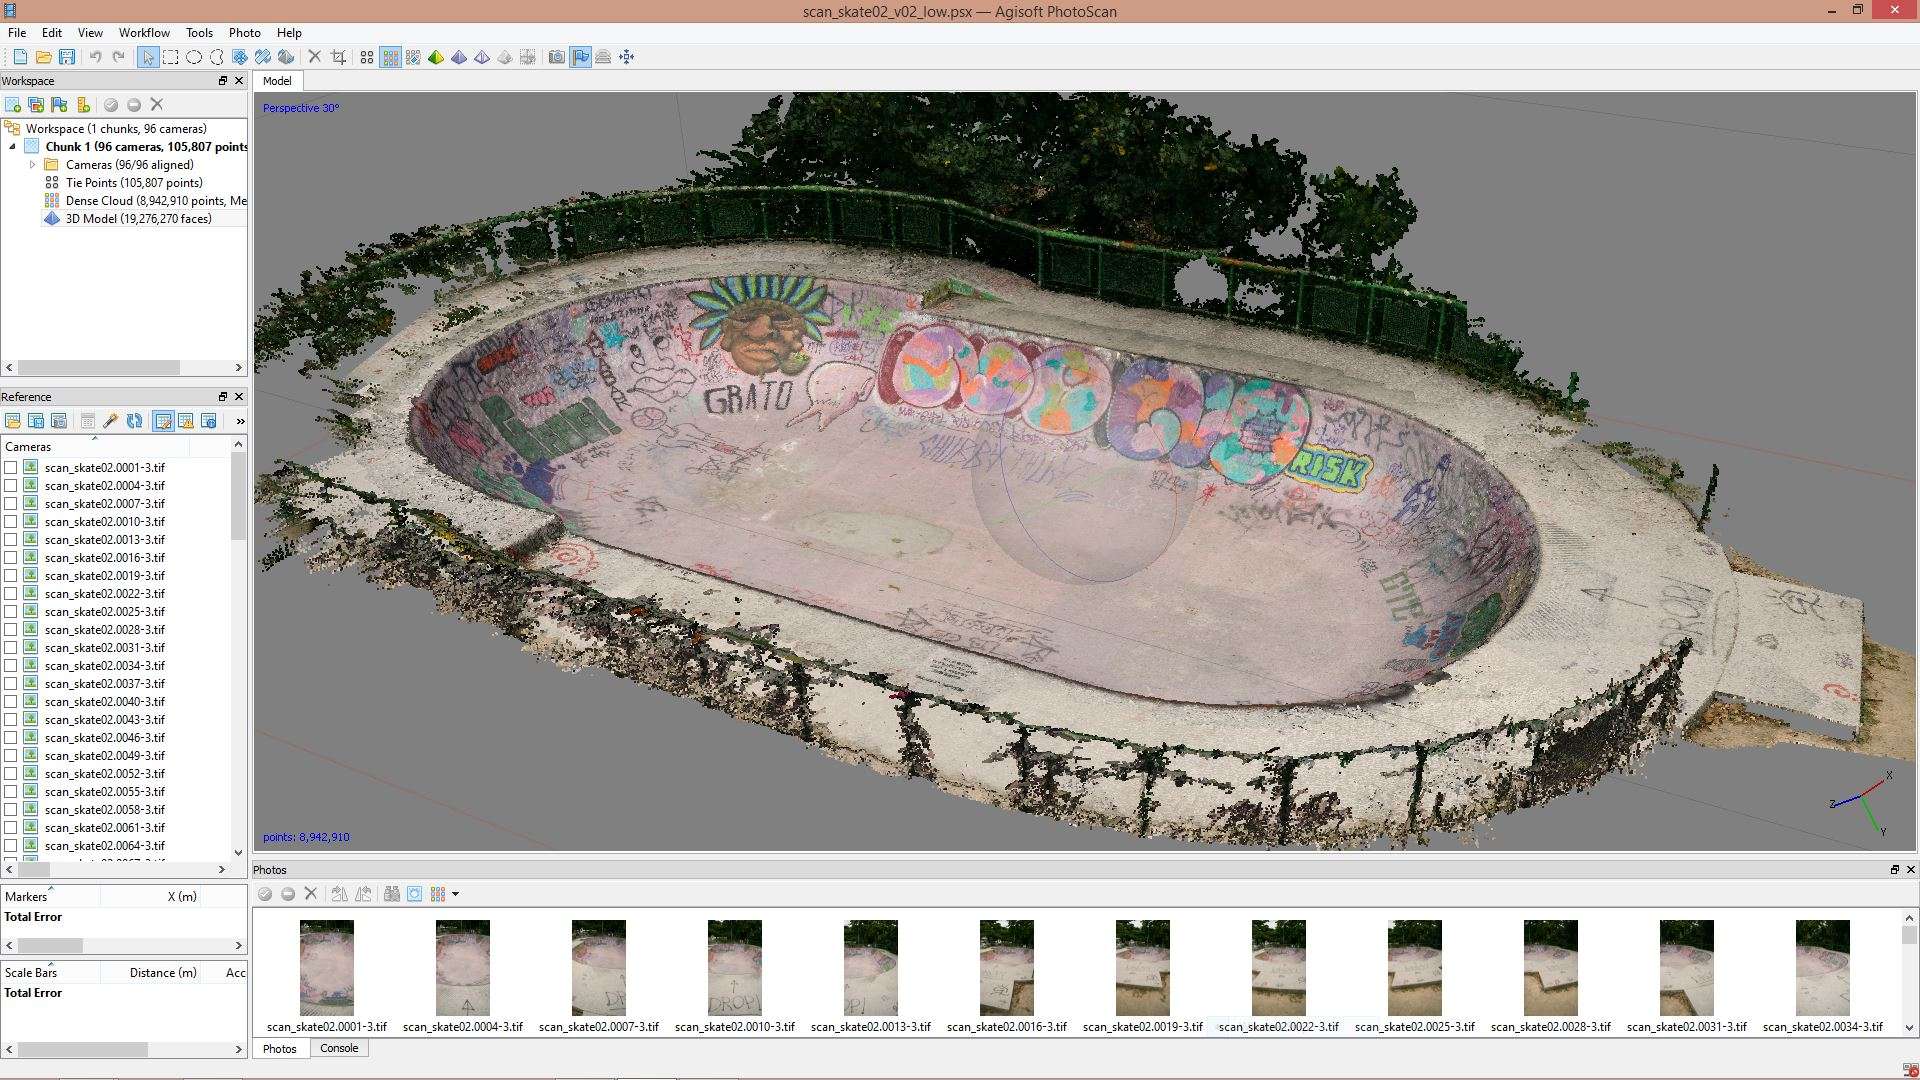
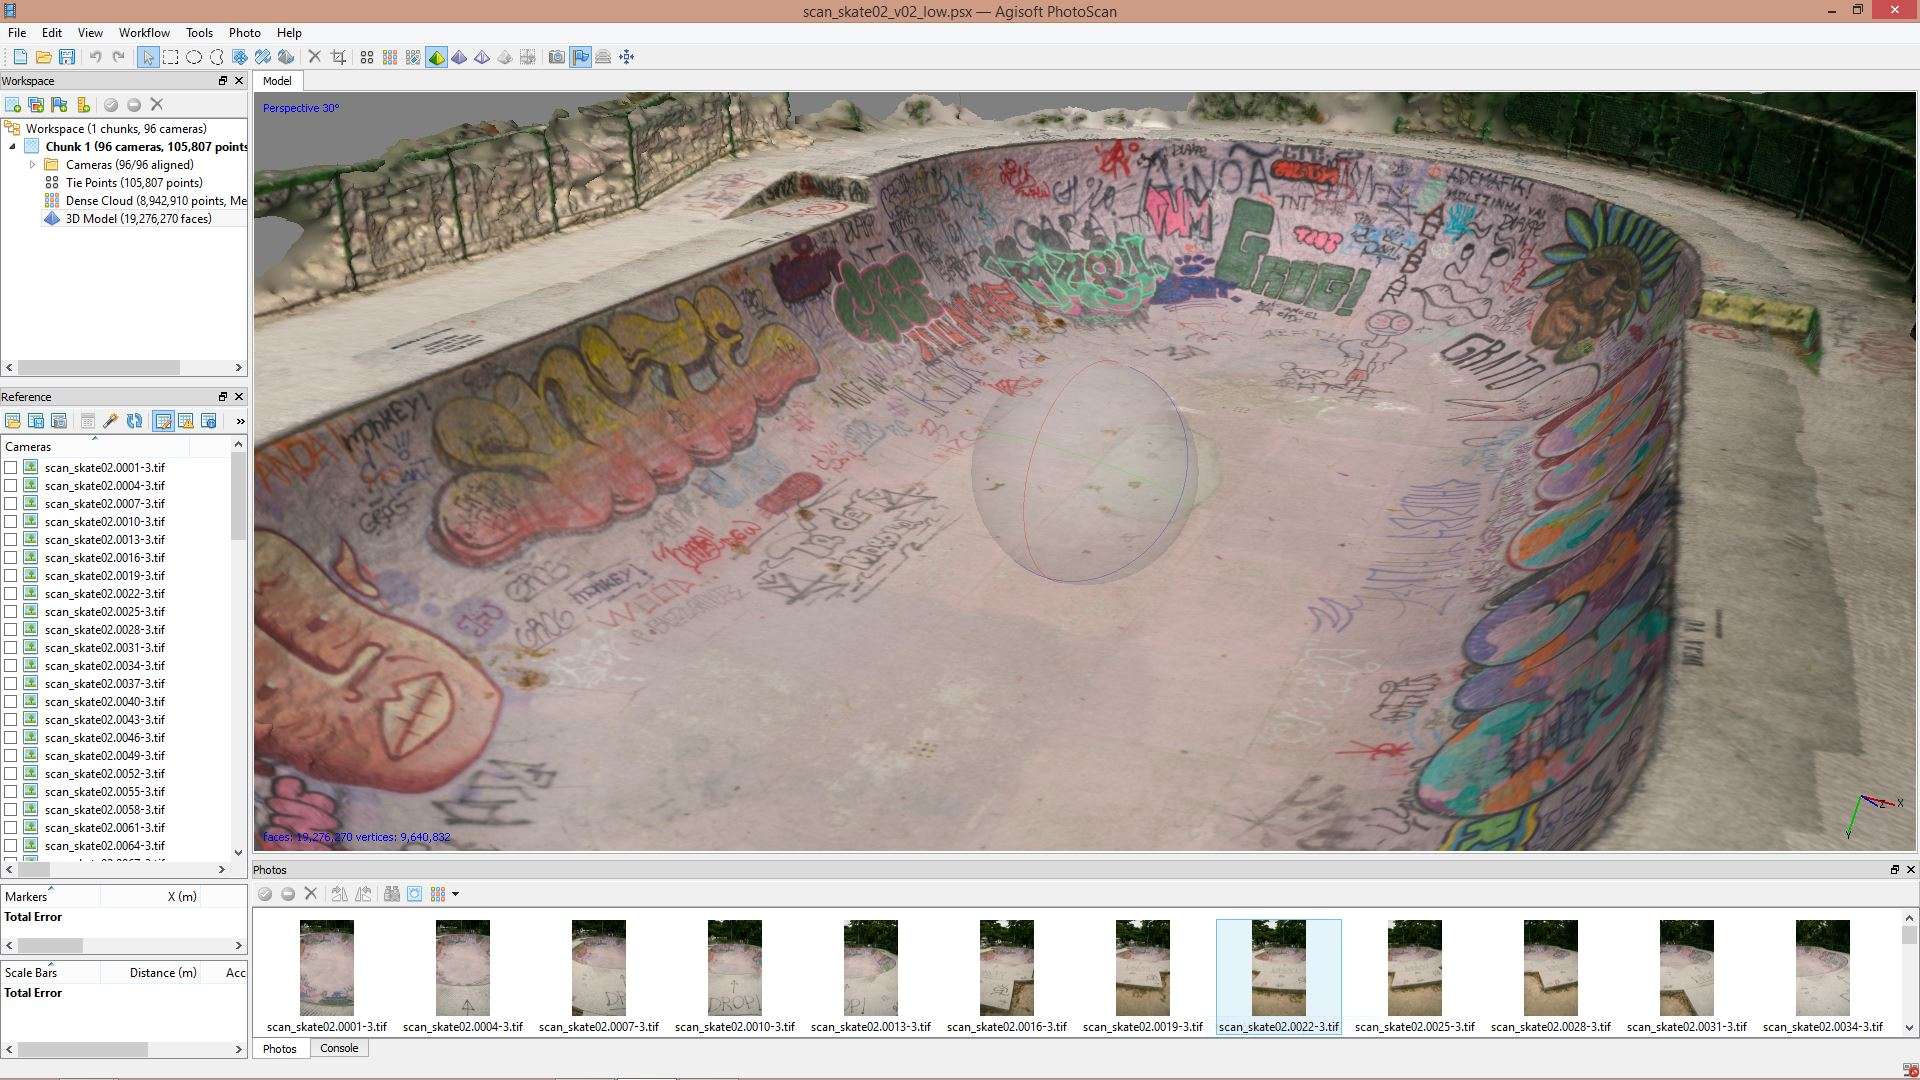
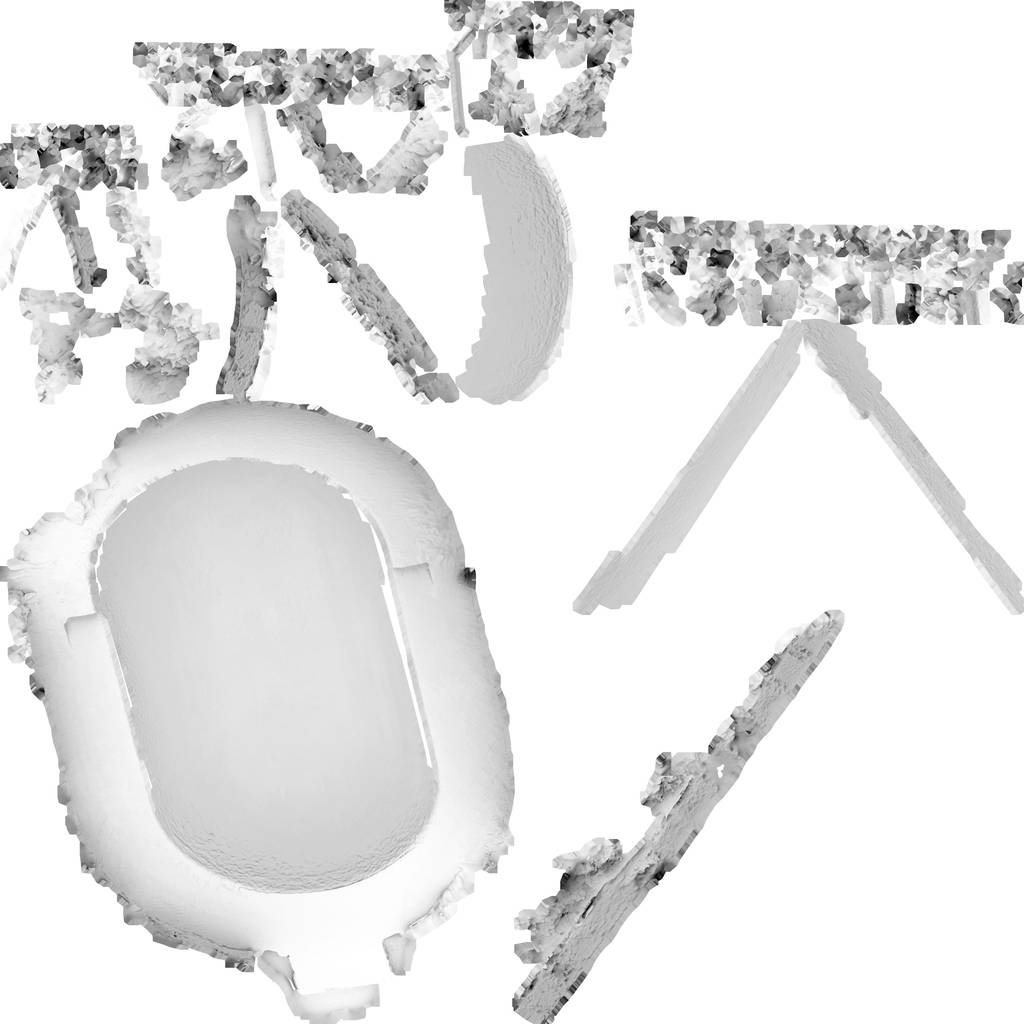
For this step you can use any of the available photogrammetry software from Autodesk, Capture Reality, Agisoft Photoscan which I used here. Import in all 96 cameras, run Align Photos, accuracy Highest. Decent bunch of points, 105,000, can skim some away with gradual select. Run Build Dense Cloud at Quality Medium, 8.9 million points, then build mesh at face count 0 (this gives you max poly with the dense cloud you have). Photoscan can often crash my laptop when the Dense Cloud is too large, so this Medium setting is something I would like to improve with a better computer. This gives me a model 19.2 million faces after cleaning up, and deleting some of the junk polygons. These steps all take some hours of processing time, plan on letting it run overnight. Next I just export out the high rez OBJ file, don’t bother bake a texture. Capturing Reality is my favorite of these three programs, it really makes highly detailed models, and very fast without ever crashing, somehow it just grinds through anything. https://www.capturingreality.com/
Make low poly mesh from big Photoscan OBJ.
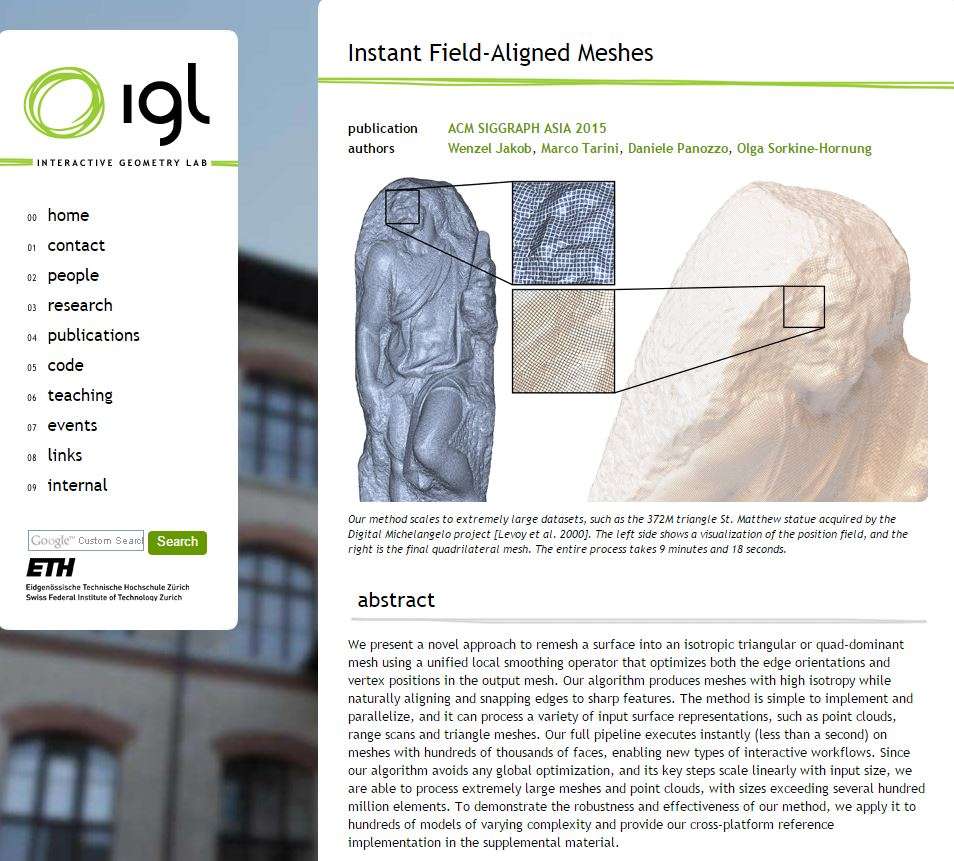
For this I am using the miracle software called Instant Meshes which you can get from here for free.
http://igl.ethz.ch/projects/instant-meshes/
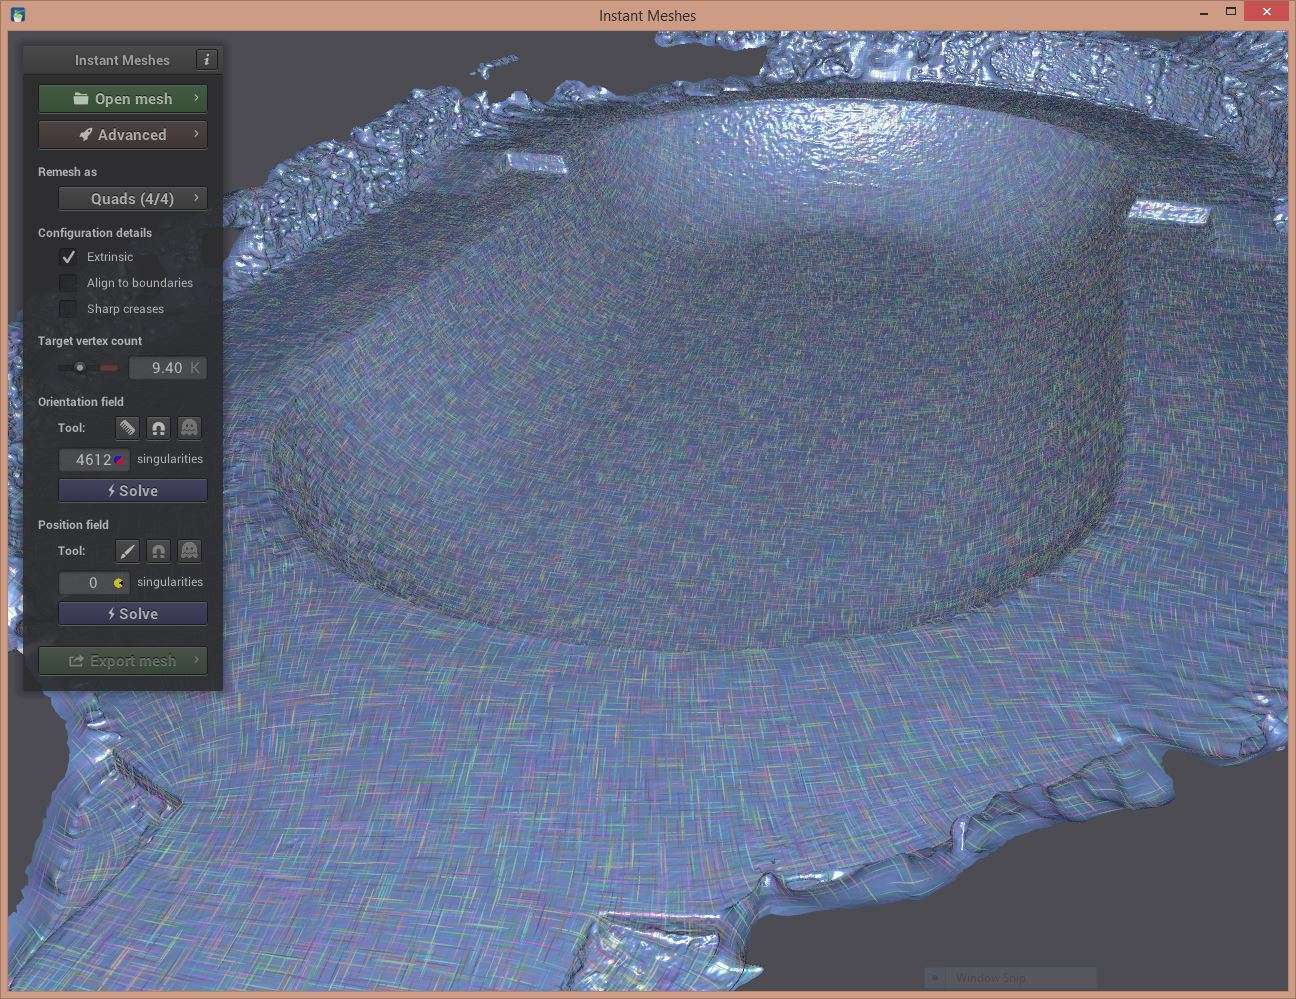
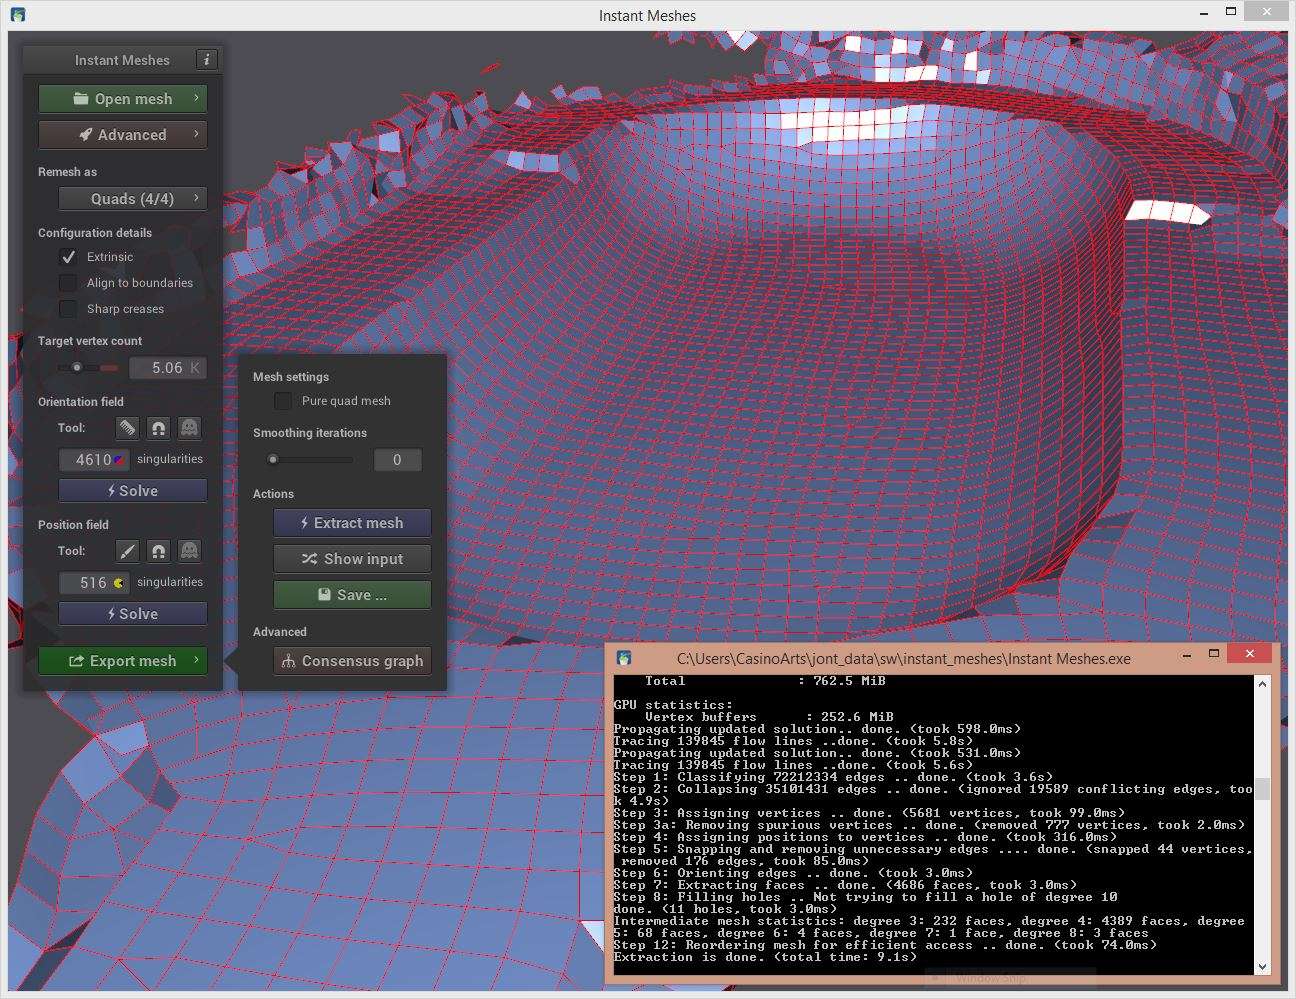
I know very little about this utility, but it does work, and it just cleanly made a 10k poly model from my scanned 18 million poly mess in less then 30 minutes. You just import the OBJ, hit the first Solve button, wait, then decide a target vertex number, then solve again, then export out an OBJ again. Honestly it is like a miracle, it exports nice little 4 sided polygons. Congrats to the very smart people who made that utility. Really though you can use anything to decimate the model, like Meshlab, simplgon, or even Agisoft photoscan will decimate down a 10k version of the same file. I just like the clean look of Instant Meshes. Best of all would be to spend a day creating a new model yourself. That causes depression for me, but I could imagine doing it for an important job.
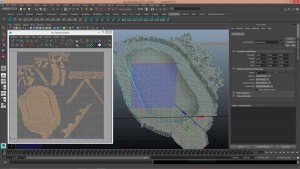
Make new clean UV’s on this low poly model.
For this step I just import the new reduced OBJ file into Maya, run one level of mesh cleanup on the thing to get rid of n-gons, and other very dirty stuff, then hit auto UV map. Export out OBJ with the new UV map. If anyone knows of better smarter ways to do this step, please do tell me as I can imagine there are some clean smart UV software utilities out there. I have heard of a couple things, just have not looked into it as I always want to get to the image and rendering part.

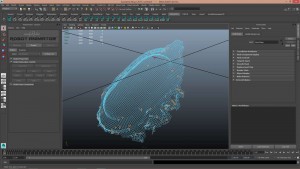
Project photos in Photoscan onto low poly model to make an EXR texture
This step will now make a nice clean EXR color texture for you newly UV’d low poly model. There are other ways of doing this, with zbrush for instance, but this method is pretty automatic. Run Photoscan and import in the low poly UV obj file of the pool, using Tools, import mesh, must be in same position as original. Build texture, mapping mode is “Keep UV”, and size of 4096 square. This 4k texture is pretty small, next time I may generate larger then scale down for optimizing. One thing I need to work on more with this step is not re-projecting all 96 original photos. There is a quality test menu in Photoscan which will put a number value on your photos sharpness, and that allows you to not use the worst 20-30 percent of photos. Also you can by hand just pick the best 40 to do your texture projection.
Also note to export out as EXR format, but there seems to always be a color error you will need to correct in Nuke, gamma by 0.414141. Not sure what causes this, as the png exports in the correct color space, I will look into this more.
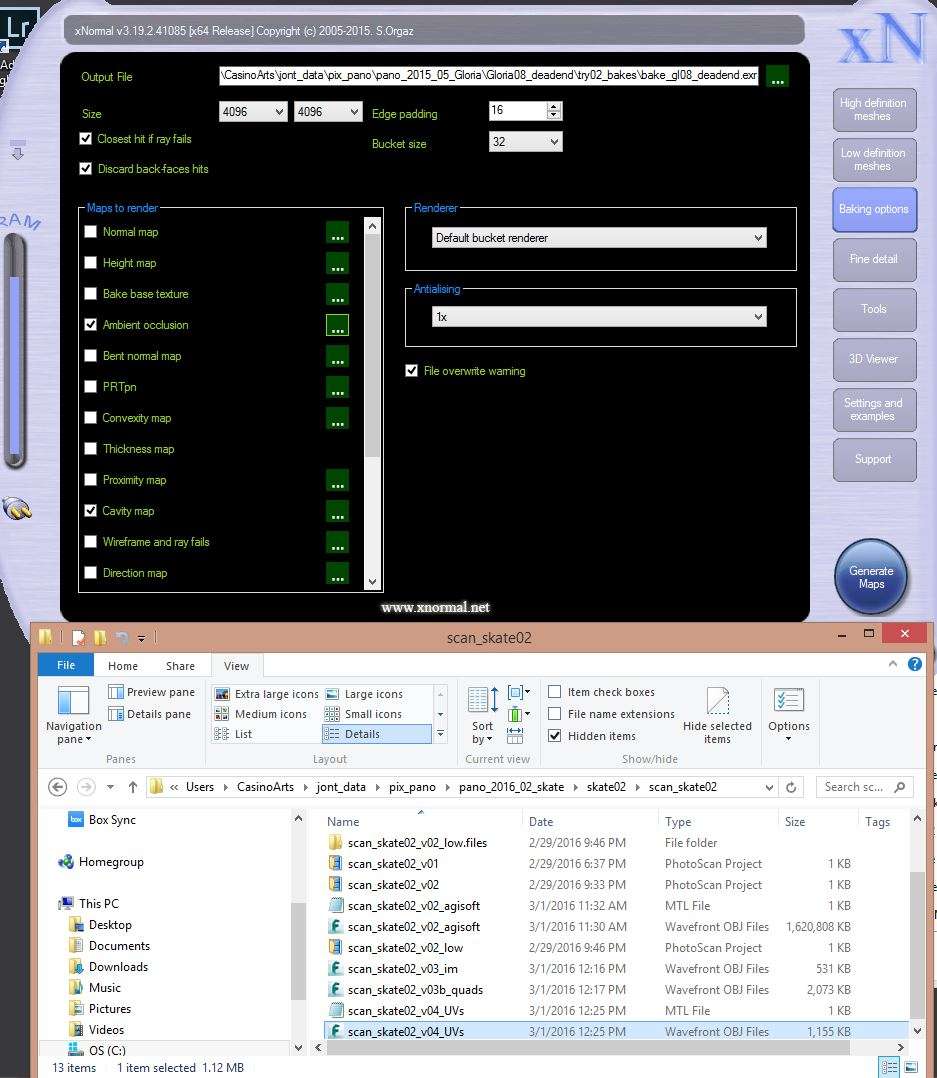
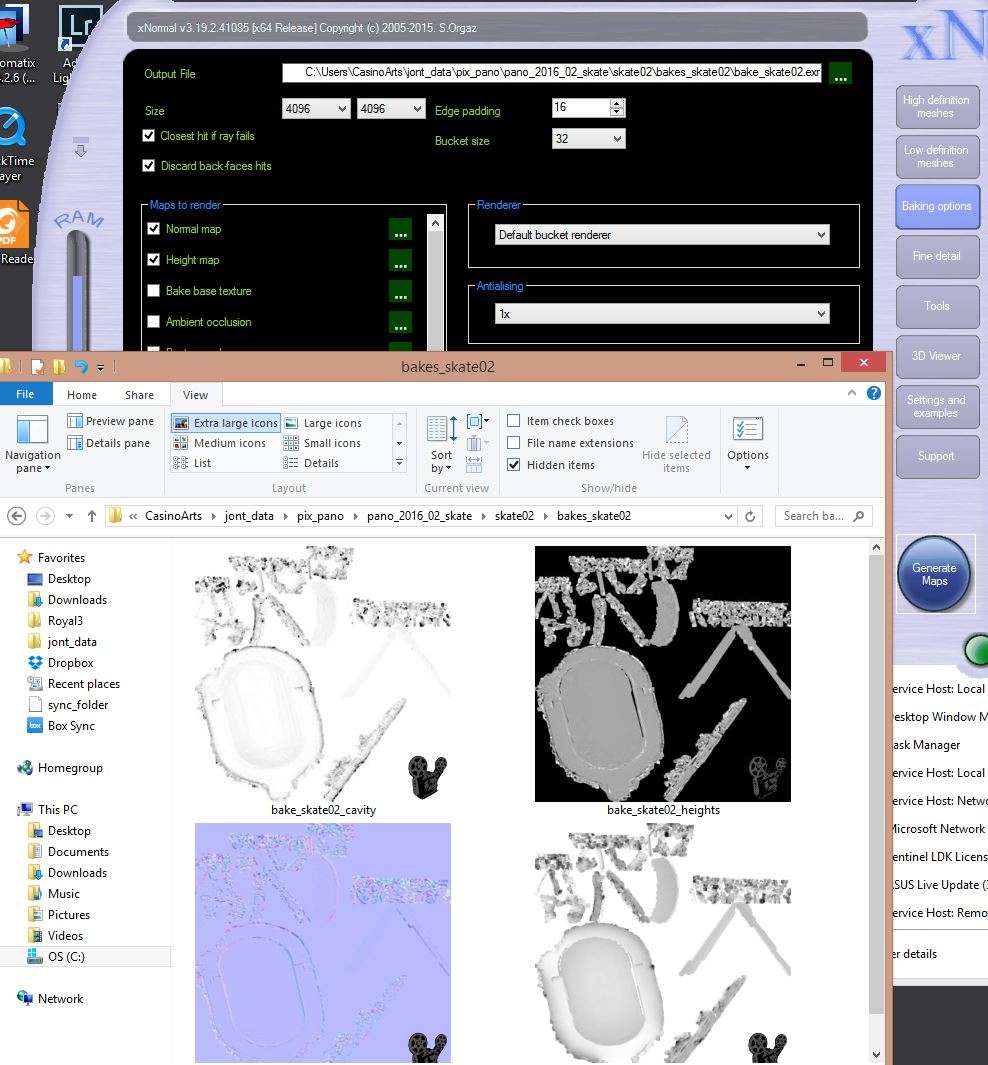
Bake detail maps using xNormal
This program is nice and simple, just import in your high rez obj, then your low rez obj with UV’s, then tell it to bake out normals, AO, cavity, height, and whatever other maps you may think you can use. These are the only ones I have tried so far, and the results seem good. This pool model is really not a great example for these maps, so I will try this more over time.
Assemble all parts together in Maya, then export to Sketchfab or some game engine.
At this point I have all the parts I need to light a nice low poly asset. Here I am going to detour out and put everything into sketchfab just to view it and post online so I can hear some feedback. At this point of the process I am kind of losing interest, so this is a fun part. Inside maya import in the skate pool geo, and scale it to a real world size and orient cleanly on the origin. Through all these other programs I have been sending a small geo in a strange orientation. This is the shape and size that came from Agisoft. Perhaps I should orient and scale it there very first step, but I have not figured that out yet.
Then I make a nurbs sphere for the pano, just map the thing, may have to reverse nurbs direction to get it to work, and then place the sphere with pano directly where your tripod and camera was, 75cm up in Y. For this diorama I will do two panos, one from each end of the pool, and they intersect each other. Then convert to polygons, and boolean intersect to combine them. Delete away polygons we will never see underneath, and do convert to file texture in the hypershade to bake out new 3500 (my pano is 7000 x 3500, so that is my upper limit), pixels square file textures for new sky images. Then export out OBJ for the last time, and upload to sketchfab. There you can import the baked textures and put them in the correct shader slots. My goal was to have a fast loading model, but the 4k textures as jpeg do slow it down a little.
I have run out of steam, that is really more then enough. Hopefully I will make a part two where I bring the elements into Unity. For accurate lighting from that sky I will have to bake out the original sky lighting from the texture, so this will be a maya mental ray baking step, then Nuke to divide out of the texture perhaps. Lastly I may do a build in Unity that can be hosted on my website. Totally guessing at this point, but I think that should work.
Contact me on twitter @tojek_vfx if you have any comments, suggestions, or questions.